 Doris Sander
 Michelle McCord
 Lisa Dickinson
 Keisha Campbell
 Amanda Johnson
 Don't forget to check the gallery tomorrow night at midnight CST for the full reveal!
 Doris Sander Michelle McCord Lisa Dickinson Keisha Campbell Amanda Johnson Don't forget to check the gallery tomorrow night at midnight CST for the full reveal!
 I grew up loving all things crafty, having had my first crafty love affair with crocheting when I was about 7 years old. Although I considered myself crafty as an adult, I never really considered myself creative... until I found scrapbooking (or should I say that it found me? :-) Scrapping is my perfect hobby - it gives me an excuse to chase my children around with a camera, and it also gives me a good reason to play with pretty things, especially those that sparkle.
  There is a historic district near my house that my family and I love to stroll around in. There is a lovely eclectic mix of mom and pop shops, antique stores, toy stores, etc. As we were driving through the district recently, I noticed this furniture store that I had never seen before, and it happened to share the same name that I have. I grabbed my camera and managed to take this photo leaning out my car window as we were driving by!
 This is a glimpse of one wall of my scraproom. The shelf is full of random things that make me happy, and I love my acrylic paper holders that keep my papers organized. I also have lots of wire organizers and cabinets to hold my goodies - organization is not my strong point, and I need all the help I can get!
  This was my favorite layout that I completed with the gorgeous JBS kits. This layout has a little bit of everything that I like best - handcutting, misting, sewing and pretty details such as flowers, scallops and butterflies. Not to mention that I adore these photos of my daughter posing for the camera!
 I couldn't resist making another layout with my September kit. I just love its yellows so much.


 Thanks for the inspiratino Dina!
.jpg) The first is by Tracie Claiborne who writes . . . The Creative Cafe journaling insert that came in the September kit was a perfect base for a mini-album. (Even though it doesn't show in my album, I used the pages as a base for each of my album pages.) I turned the chipboard backing that came with it into a cover by adding JBS and 7Gypsies paper on either side. Then I used the chipboard piece that came with the Project Kit for the back of my mini-album. I cut it a little wider, allowing it to extend on the side. I LOVE the yummy black polka-dot cardstock that came with the kit. I used it to make a fat scalloped border for the cover. My inspiration for this project came from the 7Gypsies sticker sheet. The sticker "it speaks to me" appealed to me and I went through a long list of things that I could do a mini-album about and finally settled on my love of reading.
The first is by Tracie Claiborne who writes . . . The Creative Cafe journaling insert that came in the September kit was a perfect base for a mini-album. (Even though it doesn't show in my album, I used the pages as a base for each of my album pages.) I turned the chipboard backing that came with it into a cover by adding JBS and 7Gypsies paper on either side. Then I used the chipboard piece that came with the Project Kit for the back of my mini-album. I cut it a little wider, allowing it to extend on the side. I LOVE the yummy black polka-dot cardstock that came with the kit. I used it to make a fat scalloped border for the cover. My inspiration for this project came from the 7Gypsies sticker sheet. The sticker "it speaks to me" appealed to me and I went through a long list of things that I could do a mini-album about and finally settled on my love of reading. .jpg)
.jpg)
.jpg)
.jpg)
.jpg) The second is a creation is a charming hodge-podge mini by Jennifer Webb using the August JBS Mercantile kit.
The second is a creation is a charming hodge-podge mini by Jennifer Webb using the August JBS Mercantile kit..jpg)
.jpg)
.jpg)
.jpg)
.jpg) Thanks Jennifer and Tracie for sharing your talent with us!
Thanks Jennifer and Tracie for sharing your talent with us!
 You don't want to miss any of the gorgeous details on this one. I especially love the heartfelt photography and the charming use of the scalloped border stickers and the subtle effect of the rub-on over the old book page and the diecut paper used as parenthesis and . . .
 Thanks for the inspiration Stephanie!
 5. In the Drawing Toolbar (View > Toolbars > Drawing) select the Draw tool (the one with the box and letter A on top) and from the pull down menu select Rotate or Flip > Flip Horizontal. You resulting title will look like this:
 6. Click & drag the corners of the Word Art box to resize your title to the dimensions you want.
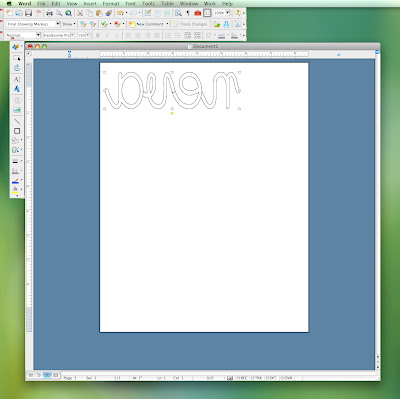 7. Print your document on the back (untextured side) of the cardstock of your choice.
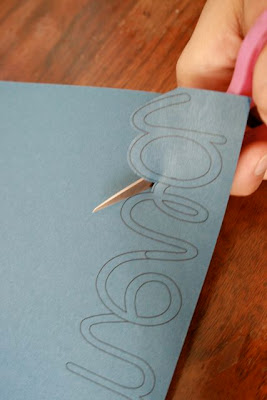 9. Flip your hand cut title over and apply it to your page.
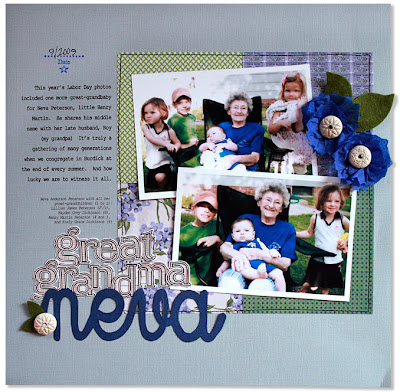 Page Supplies:
 Today's inspiration is brought to you by Celeste Smith. It's a fun and insightful layout of her son's eight favorite things as an eight year old. Thanks for the inspiration!
 The September layouts just keep coming! Jenni loaded this elegant yet fun layout into her gallery this week. Swing over there to read her write-up. She always comes up with the best tips and shares the most delightful background bits.
 Doris got an additional layout done as well. And she has another class coming up at Get It Scrapped! at the end of this month. Product Pizzazz 201: Details . . . you can check it out HERE!
 Supplies Used:
 • Using scissors or a craft knife and craft matte cut off the excess patterned paper
 • Apply rub on letters and the “&” as shown using Old School Mini Alphas – Brown onto the center of each Memo Pad square
 • Place two Self Adhesive Pearl Flowers – Cantaloupe down the center portion of the paper dolls shirts.
 I've had these photos sitting in my 'to scrapbook pile' since *sigh* 2006 (don't judge me). I've been on a two page layout role this past couple weeks, and I just knew when I saw this Jenni Bowlin paper, that it would work well with these pictures. I love how, while I used so many photos, the patterns don't take away from that, but support my theme. I can't wait to get to the next batch!
  The squares photos were punched with my large 2 1/2 inch square punch. I love how I was able to put that large pile of photos all on one page and not lose any of the mood or feeling in my prints with my crop.

 Isn't this Halloween House just darling? And there's still plenty of time to make one before the happy haunting season begins!
 At the very least I am going to make some of these supercute pumpkins. You can find a complete tutorial HERE in the wholesale gallery.
 Thanks for the inspiration Michelle!
 Congratulations to AmyA, this month's contest winner! I loved her entry "My Cowboy" because it so captures the essence of the old west. Don't you think she used Sherriff's Office perfectly?
